
macOS blocks it on first launch, which is expected. The guide below covers how to allow this one app and what that means. You can also wait for a signed build, or use the from-source path in the repository docs.
1. Download and verify
Pick the artifact matching your platform and architecture from the download centre. Compute its SHA-256 before running anything, and compare it character by character with the value shown on that page.
2. Launch OneAgent
Unpack and run it. The interface is served on your machine's loopback address, never exposed to your LAN or the internet, and the local service exits with the app.
First launch on macOS: why it is blocked, and how to allow it
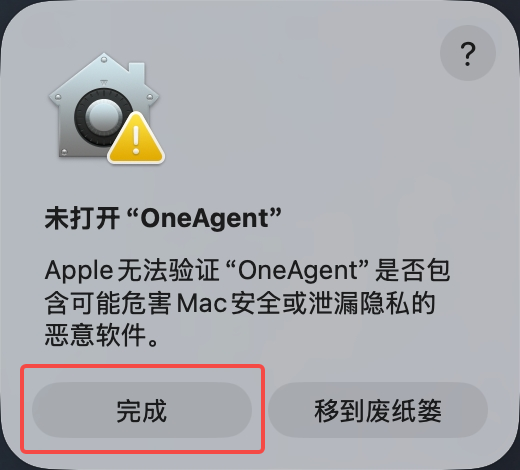
The current builds carry no Apple Developer ID signature and are not notarised. Gatekeeper therefore refuses to open them, and the most prominent button in the first dialog is “Move to Trash”. This is not a corrupt download or a false positive — it is what Gatekeeper does with every un-notarised app.
Do one thing before continuing: go back to the download page and check the SHA-256. A signature is what normally answers “is this the file the publisher built”. Without one, the checksum is your only equivalent. If it does not match, do not open it.
This dialog appears on first launch. Choose Done, not Move to Trash.
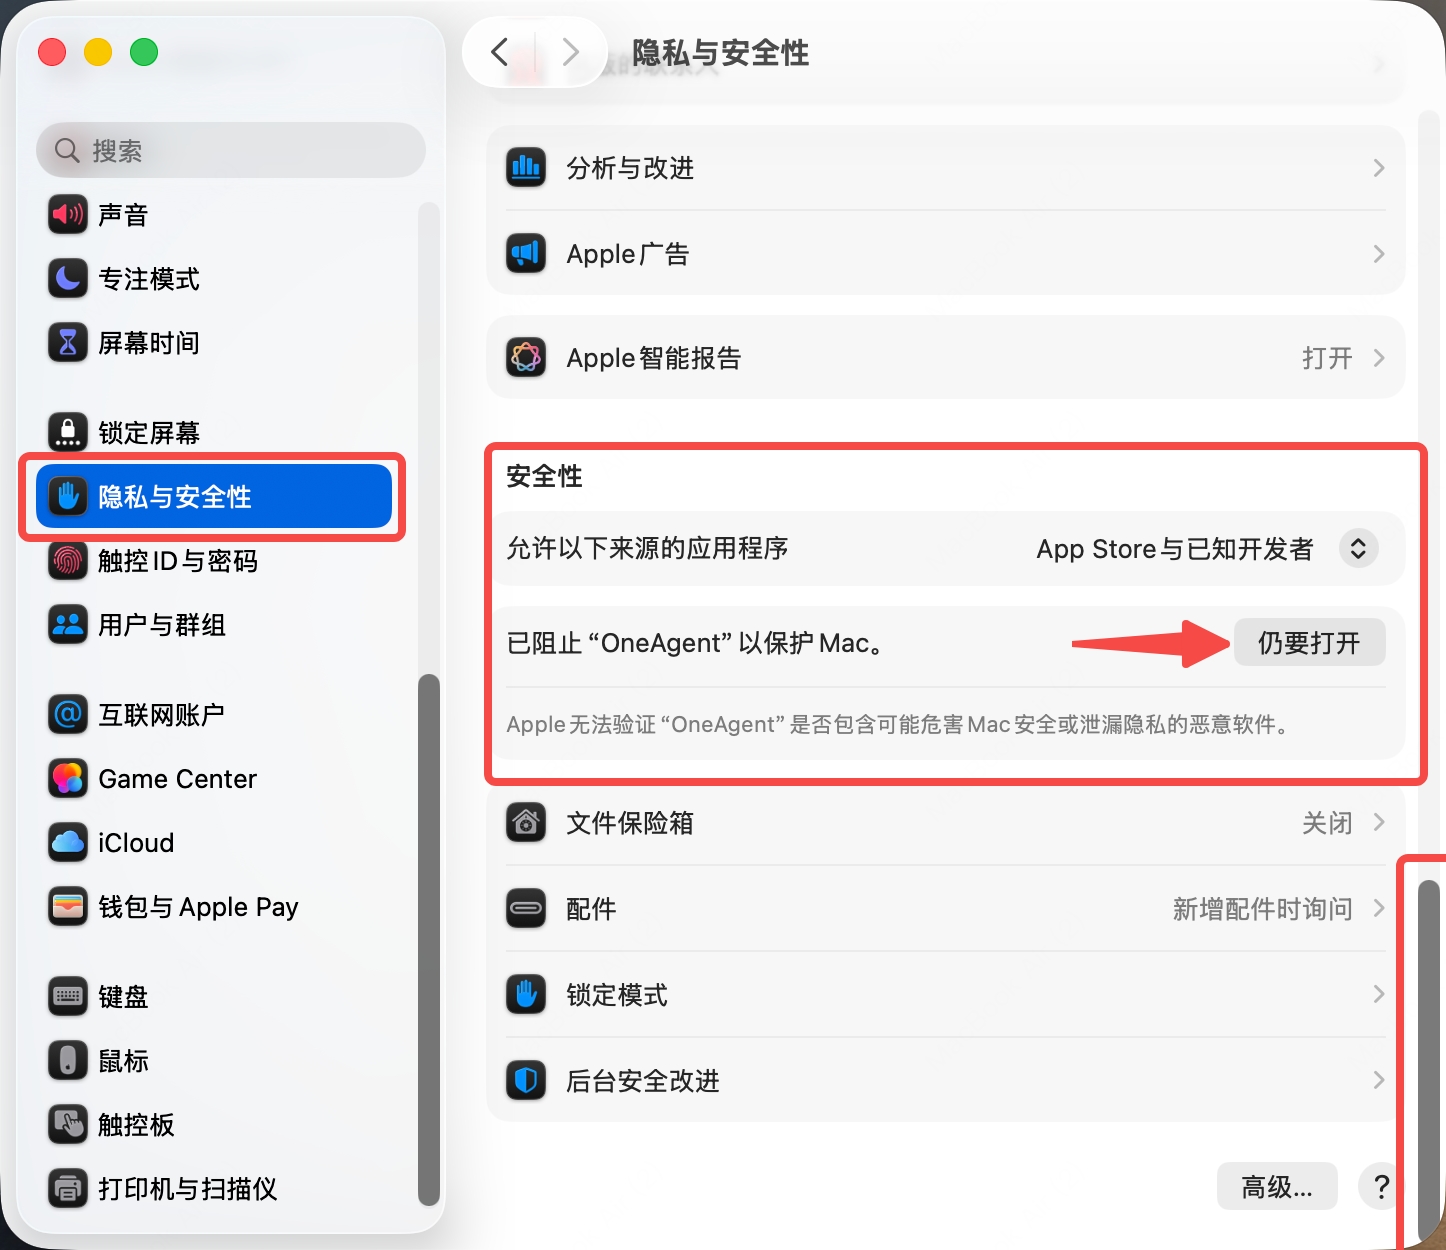
Open System Settings › Privacy & Security and scroll to Security. A line reading “OneAgent” was blocked to protect your Mac appears there, with an Open Anyway button. It only shows for a while after the block, so if it is missing, launch the app once more.
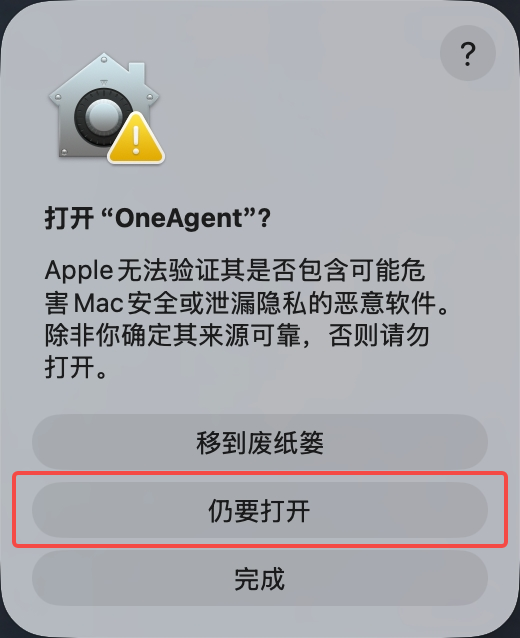
Confirm once more. This dialog states the risk plainly: Apple cannot verify the source. Choose Open Anyway.
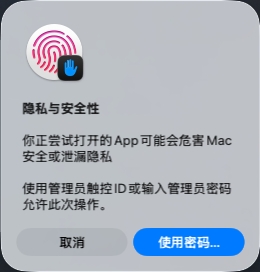
Authorise with an administrator's Touch ID or password. macOS asks for an administrator because this changes an execution policy on the machine, not just a single click.
It adds an exception for OneAgent alone, letting that one app skip the notarisation check. It does not turn Gatekeeper off, does not affect other apps, and does not change your system-wide security settings. OneAgent will never ask you to run spctl --master-disable or anything like it — instructions to disable protection globally do not come from us.
The trade is worth stating: you give up Apple's assurance that this binary was scanned, and take on verifying the SHA-256 yourself. Once signing and notarisation are done, none of these four steps are needed and this guide comes down.
3. Choose an agent
Choose the tool you actually intend to use. Agents marked “official guide” still go through the flow, but OneAgent will not dress them up as automatically installed or configured.
4. Connect your own provider
Choose a provider or a custom compatible endpoint, and use your own API key. OneAgent offers no shared key, builds no unified model gateway, and never bills you for model usage.
5. Test the real protocol
A reachable model list does not mean the agent will work. OneAgent tests the connection using the protocol that agent actually speaks: OpenAI Chat Completions, Anthropic Messages, or OpenAI Responses.
6. Review what was written
The final page shows each agent's result, where its configuration lives and how to start it. Backups are taken before anything is modified, and errors surface immediately rather than at the agent's first request.
Your key is written only to the local config or OneAgent environment file the target agent needs to work. It never reaches a OneAgent profile, log, screenshot or telemetry event.
If something goes wrong
- Agent missing: install it from the official source shown on the page, never from an unverified mirror script.
- Key rejected: check permissions and balance in the provider's own console. Do not paste the key into a chat or an issue.
- Protocol mismatch: switch to a model that explicitly supports the agent's protocol, rather than only checking
/v1/models. - Checksum mismatch: do not run the file. Keep the filename, the download URL and the hash you computed.
- macOS says the app “is damaged and can't be opened”: this is usually still the notarisation block rather than a genuinely corrupt file. Check the SHA-256 first; if it matches, follow first launch on macOS.